Guide 01
Getting started
From opening the box to seeing your first train.
Browse all help guides
Before you start
Have your Lineside, its USB-C cable, a suitable USB power supply, your home Wi-Fi password and a phone or computer to hand. You need a 2.4 GHz Wi-Fi network with internet access. There’s no app to install.
Connect USB power and switch on your display. Follow the instructions on its screen. These guides cover the current device interface; screenshots show example settings and stations.
1. Connect your Lineside to Wi-Fi
- Open Wi-Fi settings on your phone or computer and join LinesideInk-Setup.
- Stay connected if your phone says this network has no internet. It is a temporary connection to your display.
- The setup page should open automatically. If it doesn’t, enter http://192.168.4.1 in your browser’s address bar while connected to LinesideInk-Setup.
- Choose the Wi-Fi configuration option, select your home network, enter its password and save.
- Wait for the display to confirm the connection. The setup hotspot will disappear. Reconnect your phone or computer to the same home Wi-Fi.
2. Open and unlock your settings
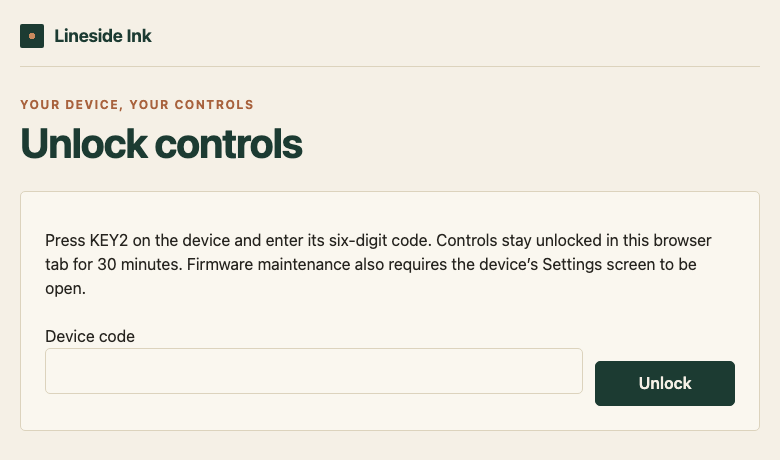
Press KEY2 on the display to open Settings if it isn’t already showing. Scan the QR code on the screen, or type http://linesideink.local/ into your browser. If that address doesn’t work, use the IP address shown on the display.
Choose Unlock editing if prompted, then enter the six-digit code shown on your own display and select Unlock. You’ll arrive on the Device page.
3. Choose how your display runs
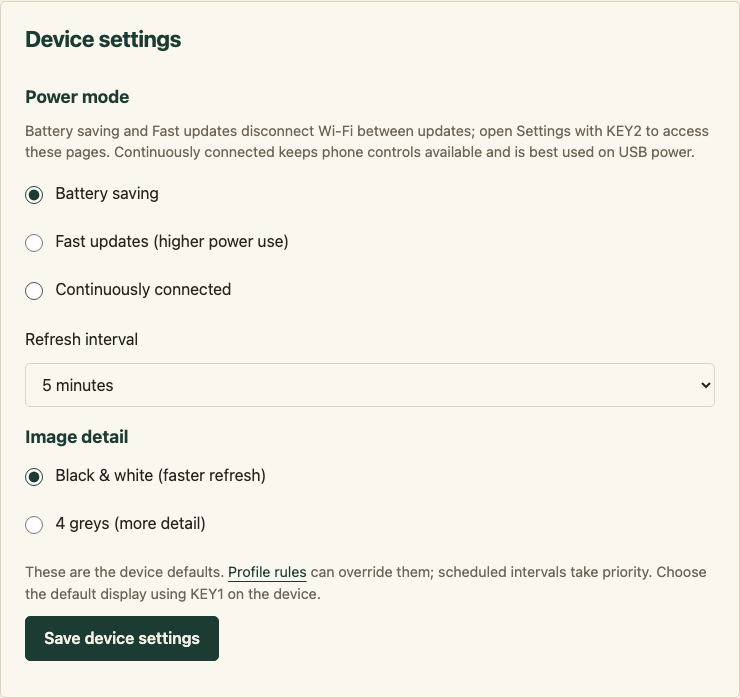
On Device, choose your power mode, refresh interval and image detail, then select Save device settings.
Battery saving is a good starting point for cordless use. If you’ll leave it on USB power and want phone controls available between updates, choose Continuously connected. You can change these choices later.
See Power & charging for the differences between modes.
4. Choose your stations
- Open Stations in the device navigation. On a phone, open its Menu first.
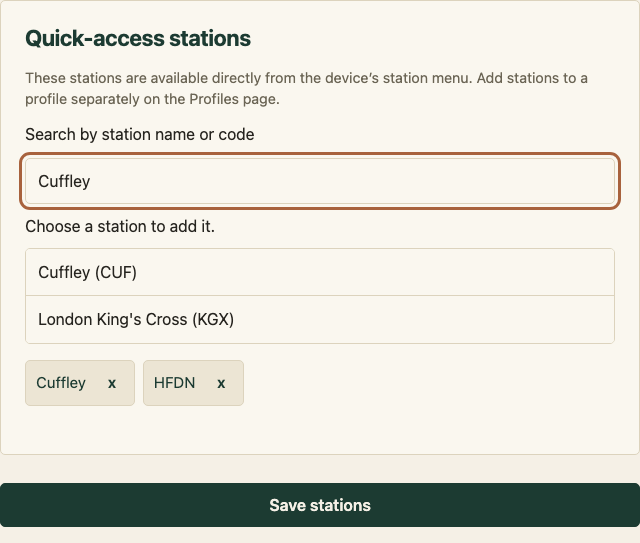
- Search for a station by name or code and select a result to add it. Add the stations you’d like to access from the device buttons.
- Select Save stations and wait for confirmation.
For automatic station and view rotation, you can set up Profiles & schedules after your first train is showing.
5. Finish and see your railway
Select Exit settings in the footer, or press KEY2. Saving a page keeps Settings open; exiting lets normal updates resume.
Press KEY0 to open the station menu. Inside the menu, KEY0 moves down, KEY1 moves up and KEY2 selects. Pick your station, then use KEY1 from the train screen to choose a display view.
Allow the display to connect and refresh. E-paper can flash as it redraws. If no train is expected soon, you may see station statistics instead. Check the update time in the screen header to tell when it last refreshed.